이제 본격적으로 인터랙션을 지닌 샘플 앱을 만들어 보자. 먼저 해볼 것은 image picker의 사용이다. 사용을 하기 위해서는 main.dart 파일에서 image picker를 import 하는 것도 중요하지만 그전에 여러 가지 설정을 해주어야 한다.

먼저 pubspec.yaml 파일에 image_picker의 dependency를 추가시켜 준다. (1.0.5 버전을 사용하였다.)

이어서 카메라와 갤러리의 접근 권한을 요청하기 위해 info.plist에 해당 코드를 추가해주어야 한다. 해당 파일은 ios/Runner/Info.plist 에 위치해 있다. 이 부분이 안드로이드에서 앱 개발을 할 때와 가장 큰 차이인데, 나도 안드로이드를 안 해봐선 모르겠지만 일단 이 설정을 해주지 않으면 에뮬레이터에서 카메라나 사진첩에 접근하려 할 때 런타임 에러가 발생한다.
추가적으로 plist 파일을 수정할 때에는 Jetbrains의 Rider나 Xcode를 쓴다면 GUI로 수정 가능하기 때문에 파일 형식이 어색하다면 GUI로 수정하는 것을 권한다.
기본 세팅
import 'dart:io'; // 파일 작업에 필요한 라이브러리
import 'package:flutter/cupertino.dart';
import 'package:image_picker/image_picker.dart'; // 이미지 컨트롤을 위한 라이브러리
쿠퍼티노 디자인을 위한 라이브러리를 제외하고, 파일 작업과 사진 업로드를 위해 두 라이브러리를 추가로 불러온다.
void main() {
  runApp(const MyApp());
}

class MyApp extends StatefulWidget {
  const MyApp({Key? key}) : super(key: key);

  @override
  State<MyApp> createState() => _MyAppState();
}
이전까지의 예제에서는 runApp에서 모든 구성을 처리해 주었는데, 이렇게 되면 화면 구성이 복잡해질수록 코드의 가독성이 매우 떨어진다. 따라서 MyApp()이라는 클래스를 선언하고 이 클래스가 구성하는 화면이 앱 진입점이 된다. 진입점이란 앱이 실행될 때 처음으로 구성하는 화면을 의미한다.
MyApp 클래스는 StatefulWidget을 상속받는다. 위젯에는 StatelessWidget, 그리고 StatefulWidget 두 가지 옵션이 존재한다. 지금과 달리, 위젯에서 액션이 발생했을 때 상태가 변하지 않는다면 StatelessWidget을 사용하면 된다. 현재 예제에서는 사진 이미지를 불러오기 때문에 화면의 상태가 바뀌므로 StatefulWidget을 사용한다.
MyApp 내부 첫 번째 코드는 생성자를 나타내며 보통 수정할 일이 없다.
createState()는 _MyAppState라는, State<MyApp> 클래스를 상속받은 클래스의 객체이다. 말이 좀 어려운데, 단순히 설명하자면 상태를 반환하는 메서드이다. 이 메서드를 통해 화면의 상태가 반환된다고 보면 되고, 이 코드 또한 웬만해서는 수정해 줄 필요가 없다.
class _MyAppState extends State<MyApp> {
  XFile? _image; // 이미지를 담을 변수 선언
  final ImagePicker picker = ImagePicker(); // ImagePicker 초기화

  /*

  여기서 UI 구성

  */

}
앞서 만나 본 코드들은 복잡하고 어렵기만 하지, 막상 수정할 일은 딱히 없다. 화면을 구성하는 우리의 역할은 State 클래스에서의 프로그래밍이 대부분이라고 볼 수 있다. iOS 네이티브 개발자 중에 혹 UiKit으로 화면 구성을 해본 경험이 있다면, UiViewController 클래스 내에서의 코드들과 코드 구성이 비슷하다는 걸 알 수 있을 것이다. 아래의 메서드와 위젯들은 모두 이 클래스 내에서 구현된다.
이미지 가져오기
  // 이미지를 가져오는 함수
  Future<void> getImage(ImageSource imageSource) async {
    try {
      final XFile? pickedFile = await picker.pickImage(source: imageSource);
      if (pickedFile != null) {
        setState(() {
          _image = XFile(pickedFile.path); // 가져온 이미지를 _image에 저장
        });
      }
    } catch (e) {
      print('Error picking image: $e');
      showCupertinoDialog(
        context: context,
        builder: (context) {
          return CupertinoAlertDialog(
            title: Text('Error'),
            content: Text('Unable to pick image: $e'),
            actions: [
              CupertinoDialogAction(
                child: Text('OK'),
                onPressed: () {
                  Navigator.of(context).pop();
                },
              ),
            ],
          );
        },
      );
    }
  }
그냥 가져와도 되겠지만, 에뮬레이터로 실행할 때에는 카메라를 실행시킬 수 없는 에러 처리를 위해 try catch 문을 사용하였다.
화면 구성하기
  @override
  Widget build(BuildContext context) {
    return CupertinoApp(
      home: CupertinoPageScaffold(
        navigationBar: CupertinoNavigationBar(
          middle: Text("Camera Test"),
        ),
        child: SafeArea(
          child: Column(
            crossAxisAlignment: CrossAxisAlignment.center,
            children: [
              SizedBox(height: 30, width: double.infinity),
              _buildPhotoArea(),
              SizedBox(height: 20),
              _buildButton(),
            ],
          ),
        ),
      ),
    );
  }
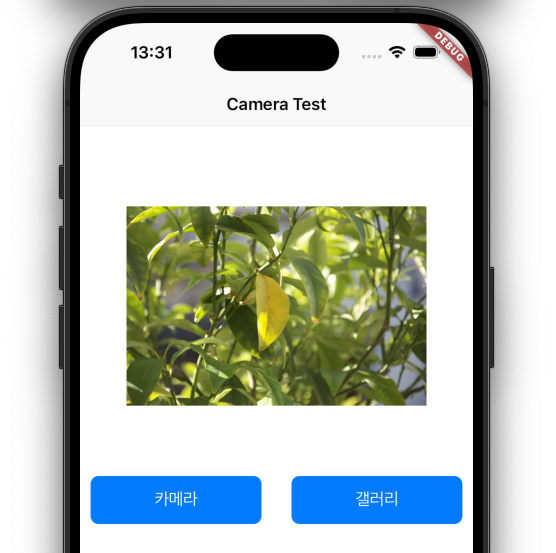
이전 예제들에서 계속 연습해 왔던 화면 구성 코드가 드디어 보인다. 코드가 복잡해질 수 있으므로 가져온 이미지가 위치할 Image Widget과 이미지를 가져오기 위해 필요한 Button Widget은 분리하여 구현하였다.
사진 공간
  Widget _buildPhotoArea() {
    return _image != null
        ? Container(
      width: 300,
      height: 300,
      child: Image.file(File(_image!.path)), // 가져온 이미지를 화면에 띄워주는 코드
    )
        : Container(
      width: 300,
      height: 300,
      color: CupertinoColors.systemGrey,
    );
  }
이미지 위젯이다. 삼항 연산자를 사용하여 이미지가 있을 때에는 이미지를, 없을 때에는 회색 컨테이너를 보여 준다.
버튼
  Widget _buildButton() {
    return Row(
      mainAxisAlignment: MainAxisAlignment.center,
      children: [
        CupertinoButton(
          color: CupertinoColors.activeBlue,
          onPressed: () {
            getImage(ImageSource.camera); // getImage 함수를 호출해서 카메라로 찍은 사진 가져오기
          },
          child: Text("카메라"),
        ),
        SizedBox(width: 30),
        CupertinoButton(
          color: CupertinoColors.activeBlue,
          onPressed: () {
            getImage(ImageSource.gallery); // getImage 함수를 호출해서 갤러리에서 사진 가져오기
          },
          child: Text("갤러리"),
        ),
      ],
    );
  }
사진 공간 아래에 수평으로 카메라, 갤러리 버튼을 구성한다.
코드 전체 보기
import 'dart:io';
import 'package:flutter/cupertino.dart';
import 'package:image_picker/image_picker.dart';

void main() {
  runApp(const MyApp());
}

class MyApp extends StatefulWidget {
  const MyApp({Key? key}) : super(key: key);

  @override
  State<MyApp> createState() => _MyAppState();
}

class _MyAppState extends State<MyApp> {
  XFile? _image; // 이미지를 담을 변수 선언
  final ImagePicker picker = ImagePicker(); // ImagePicker 초기화

  // 이미지를 가져오는 함수
  Future<void> getImage(ImageSource imageSource) async {
    try {
      final XFile? pickedFile = await picker.pickImage(source: imageSource);
      if (pickedFile != null) {
        setState(() {
          _image = XFile(pickedFile.path); // 가져온 이미지를 _image에 저장
        });
      }
    } catch (e) {
      print('Error picking image: $e');
      showCupertinoDialog(
        context: context,
        builder: (context) {
          return CupertinoAlertDialog(
            title: Text('Error'),
            content: Text('Unable to pick image: $e'),
            actions: [
              CupertinoDialogAction(
                child: Text('OK'),
                onPressed: () {
                  Navigator.of(context).pop();
                },
              ),
            ],
          );
        },
      );
    }
  }

  @override
  Widget build(BuildContext context) {
    return CupertinoApp(
      home: CupertinoPageScaffold(
        navigationBar: CupertinoNavigationBar(
          middle: Text("Camera Test"),
        ),
        child: SafeArea(
          child: Column(
            crossAxisAlignment: CrossAxisAlignment.center,
            children: [
              SizedBox(height: 30, width: double.infinity),
              _buildPhotoArea(),
              SizedBox(height: 20),
              _buildButton(),
            ],
          ),
        ),
      ),
    );
  }

  Widget _buildPhotoArea() {
    return _image != null
        ? Container(
      width: 300,
      height: 300,
      child: Image.file(File(_image!.path)), // 가져온 이미지를 화면에 띄워주는 코드
    )
        : Container(
      width: 300,
      height: 300,
      color: CupertinoColors.systemGrey,
    );
  }

  Widget _buildButton() {
    return Row(
      mainAxisAlignment: MainAxisAlignment.center,
      children: [
        CupertinoButton(
          color: CupertinoColors.activeBlue,
          onPressed: () {
            getImage(ImageSource.camera); // getImage 함수를 호출해서 카메라로 찍은 사진 가져오기
          },
          child: Text("카메라"),
        ),
        SizedBox(width: 30),
        CupertinoButton(
          color: CupertinoColors.activeBlue,
          onPressed: () {
            getImage(ImageSource.gallery); // getImage 함수를 호출해서 갤러리에서 사진 가져오기
          },
          child: Text("갤러리"),
        ),
      ],
    );
  }
}
'Dev > flutter' 카테고리의 다른 글
| [Dev, flutter] 플러터로 iOS 앱 개발 시작하기 (5) - STT, TTS (2) | 2024.08.08 |
|---|---|
| [Dev, flutter] 플러터로 iOS 앱 개발 시작하기 (4) - 서버에 이미지 업로드 (2) | 2024.08.06 |
| [Dev, flutter] 플러터로 iOS 앱 개발 시작하기 (2) - Image (1) | 2024.08.05 |
| [Dev, flutter] 플러터로 iOS 앱 개발 시작하기 (1) - Widget (3) | 2024.08.03 |
| [Dev, flutter] 플러터에서 iOS device에 빌드해보기 (2) | 2024.07.29 |